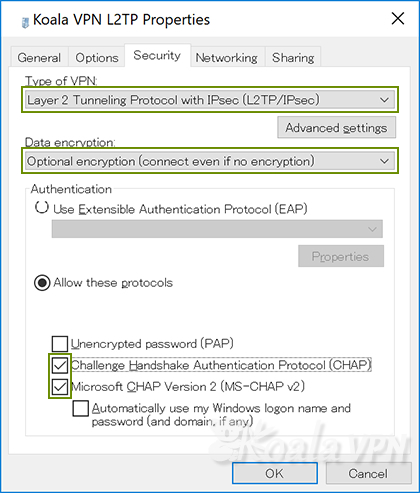
1. Type of VPN = Layer 2 Tunneling Protocol with IPsec (L2TP/IPsec)
2. Data encryption = Optional encryption (connect even if no encryption)
3. Authentication = Allow these protocols
4. Tick ‘Challenge Handshake Authentication Protocol (CHAP)’
5. Tick ‘Microsoft CHAP Version 2 (MS-CHAP v2)’
6. Click ‘OK’
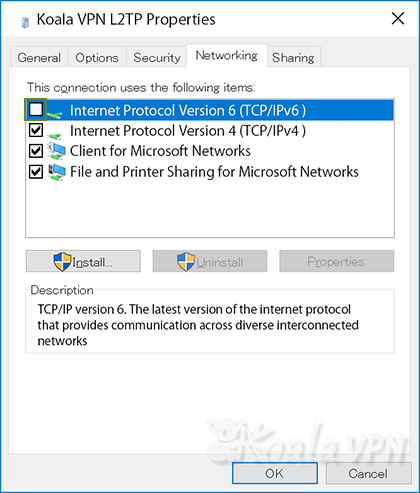
1. Untick ‘Internet Protocol Version 6 (TCP/IPv6)’
2. Click ‘OK’
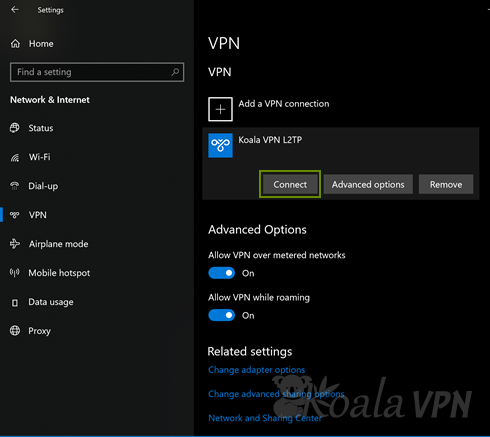
It may take from a few seconds to tens of seconds depending on Internet congestion.
If connection cannot be made successfully, please make sure there is no mistake in setting.

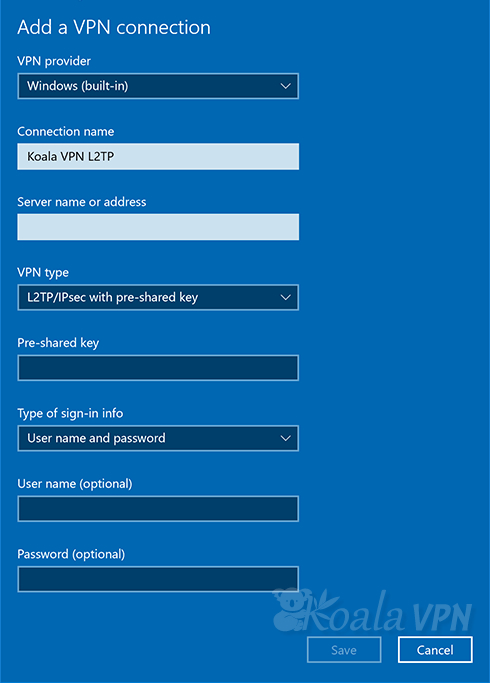
1. Select VPN Provider = Windows (built-in)
2. Connection name = your preferred name ex) Koala VPN L2TP
3. In Server name or address, enter the IP address indicated in the email
4. Select ‘Layer 2 Tunneling Protocol with IPsec (L2TP/IPsec)’ on VPN type
5. Pre-shared key = koala
6. Type of sign-in info = User name and password
7. Enter the User name and Password indicated in the email