

1. Select the newly created configuration ‘VPN (L2TP)’
2. In the ‘Server address’, enter the domain IP address you were given at the time of subscription
3. In the ‘Account Name’, enter the account name you were given at the time of subscription
4. Click ‘Authentication Settings…’
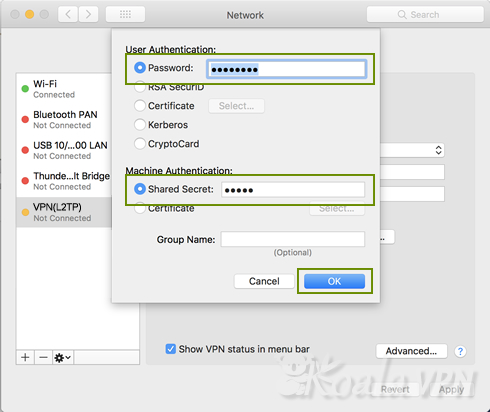
1. Enter the password you received by e-mail in the password field.
2. Enter the shared secret ‘koala’
3. Close with the OK.
4. Click 'Advanced...'
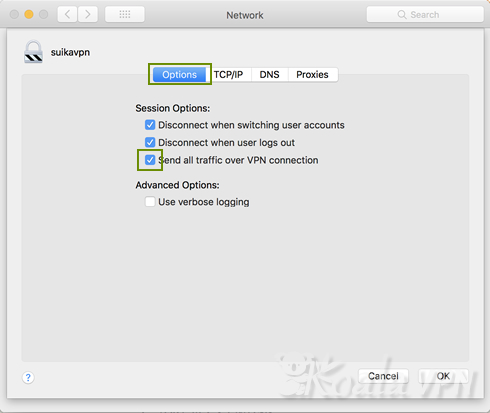
1. Tick ‘Send all traffic over VPN connection’
2. Click ‘OK’
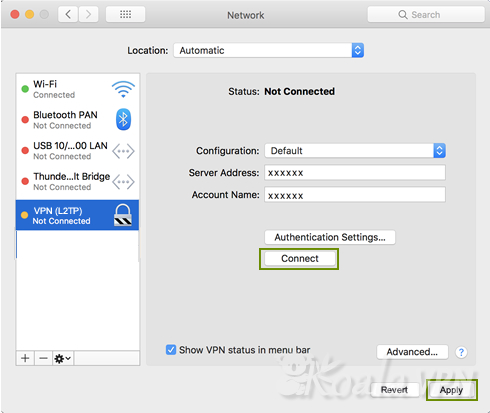
1. Click ‘Connect’ and if the status is Connected, you are successfully connected to VPN.
2. Click ‘Apply’ to complete the VPN set up.
It may take from a few seconds to tens of seconds depending on Internet congestion.
If connection cannot be made successfully, please make sure there is no mistake in setting.

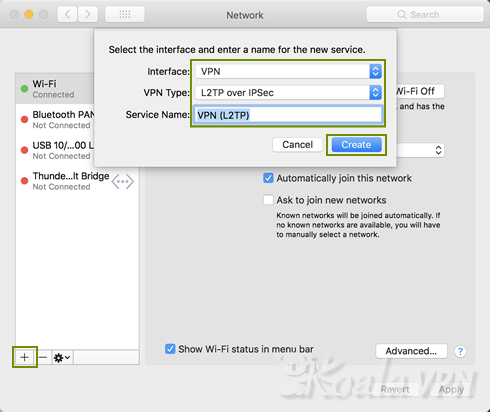
1.Click Add (+) at the bottom of the network connection services list
2.Select the Interface = VPN
3.Select the VPN Type = L2TP over IPSec
4.Enter any name you like in the ‘Server name’ ex) VPN (L2TP)
5.Click ‘Create’.